Managing Vendors
Vendor Approval and Accounts creation
To approve vendors, select the Vendor List functionality then click the “Approve” button found in the
last column.
To create an account for a vendor, select the Create button, enter the email address then click the Create Account button to save.
Editing or Deleting Vendor Details
To edit or delete the vendor details, select the three dots found in the last column at far right. You will
then select the Delete or Edit functionalities to proceed.
To delete the vendor details, select the delete functionality and confirm the action.
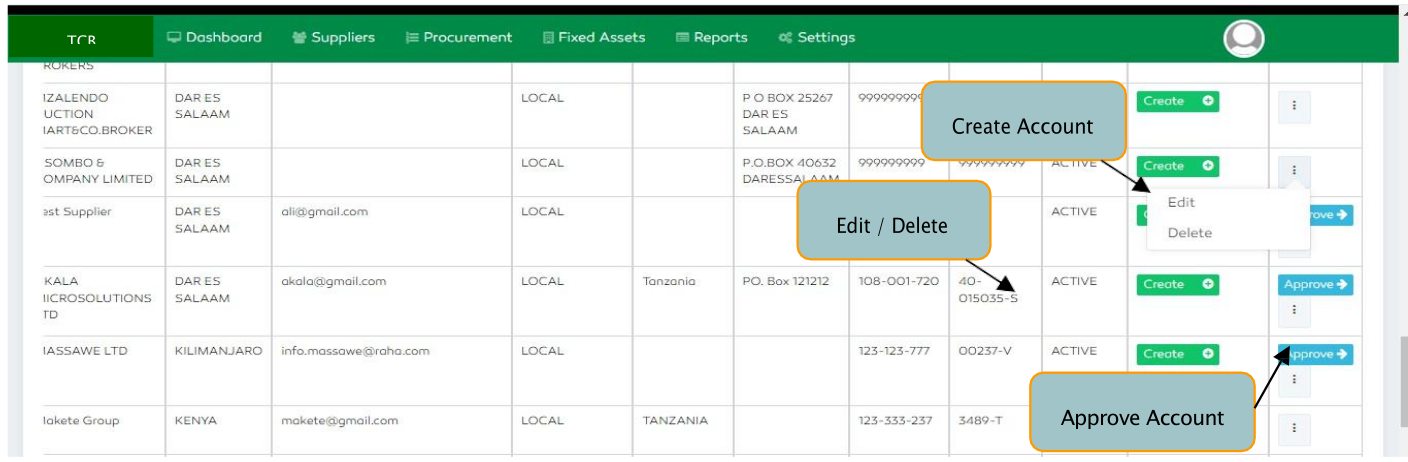
Figure 164: Managing Vendors
Editing Vendors
To edit vendors, select the Edit functionality and edit any feature of your preference then select the Update & Return feature to save.
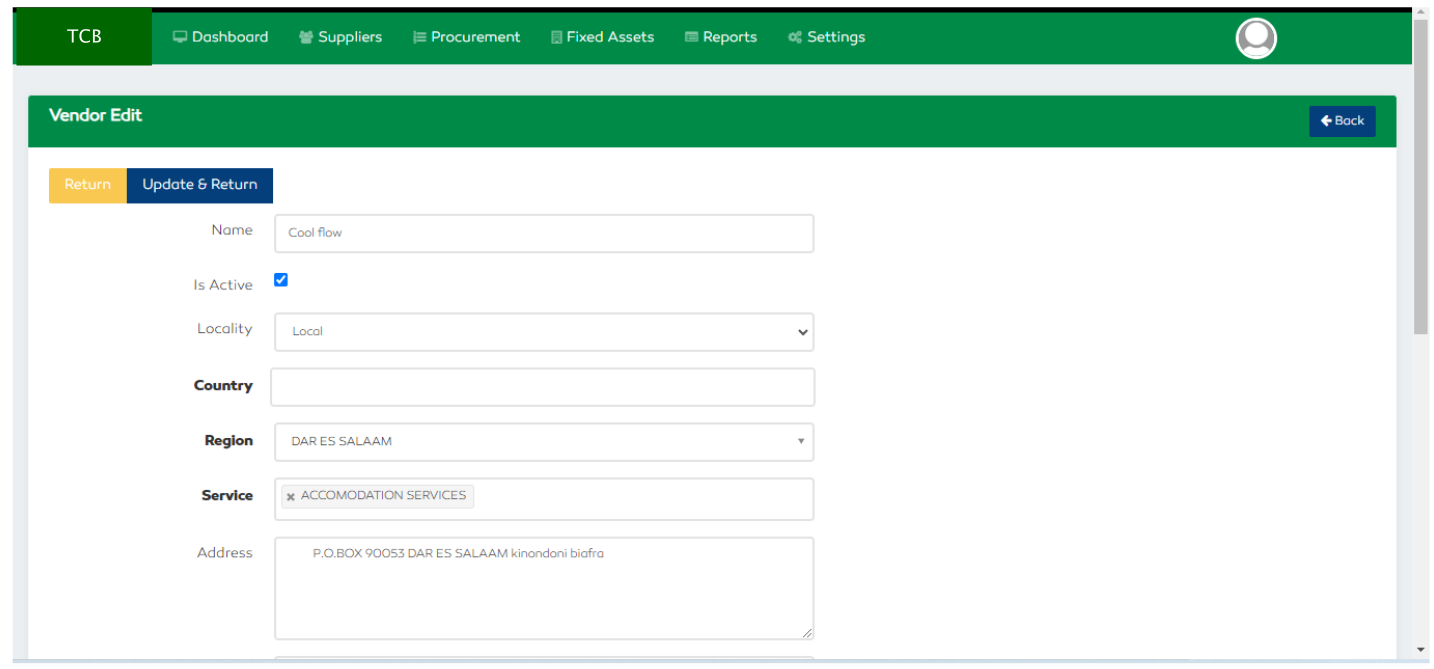
Figure 165: Editing Vendors